LoRa Gateway configuration
Overview
This document describes how to take an off-the-shelf gateway device and set it up to provide LoRaWAN network coverage to nearby sensor devices. The device used in this example is a Mikrotik wAP LR9 kit which operates in the 902-928 MHz frequency range
The instructions would also apply to the wAP LR8 kit (863-870 MHz) and other Mikrotik IoT gateway devices.
The LR9 is weatherproof and can be purchased from many NZ suppliers such as PB Tech, Go Wireless, Ascent, etc. We recommend attaching an external antenna (such as the MikroTik LoRa Antenna kit) for better coverage and range.
As with most Mikrotik products it allows for flexible configurations - it includes a 2.4Ghz Wifi radio and can operate as either an access point, or a client to connect to a nearby WiFi access points wirelessly. In this example the device is set up as an access point (i.e. a hotspot) connected to the internet via ethernet (e.g. a residential installation with a lan cable connected to a router).
This setup uses the gateway’s built in web interface. Power users will want to use Mikrotik’s free Winbox configuration tool - an example config file is provided.
Gateway setup
- Connect the gateway device via ethernet to your network and power it up. You will be able to connect to it wirelessly - it will have a hotspot name such as Mikrotik-E6B3F9
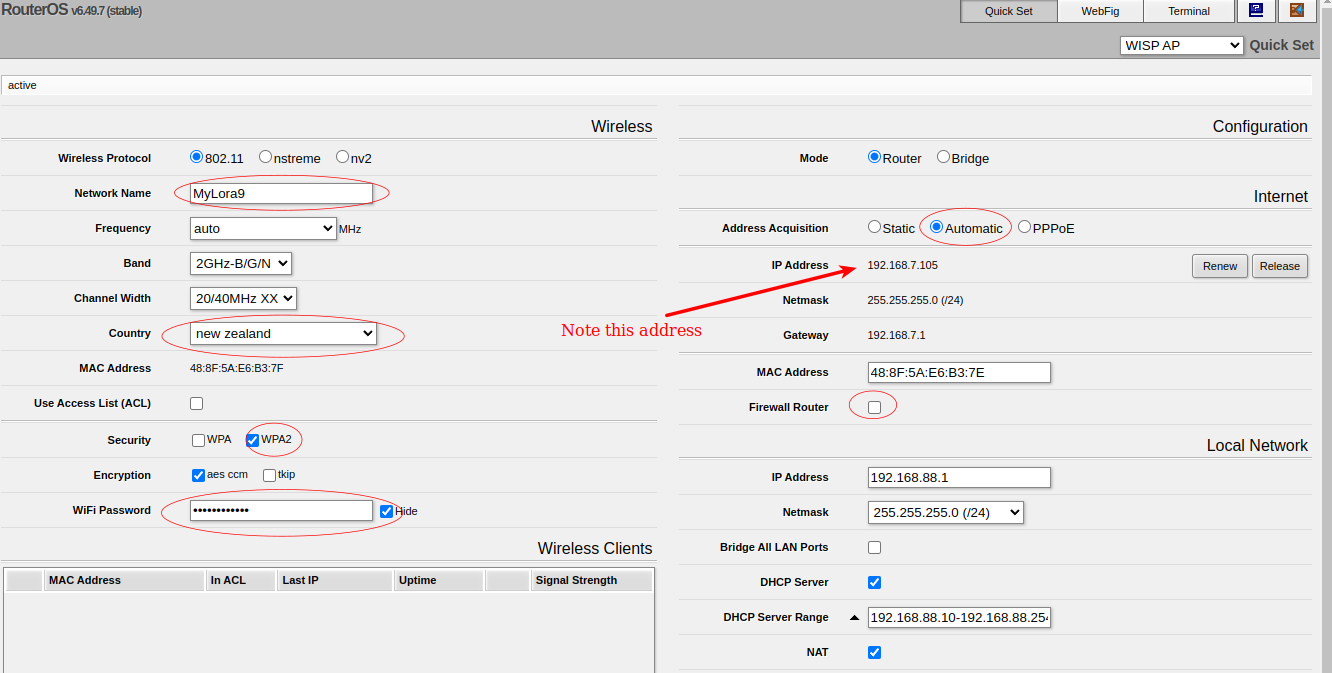
- Open your broswer and connect to the address http://192.168.88.1/ and close the initial welcome screen
- Change the Quick Set drop down to PTP Bridge AP default configuration as follows:

- The Network Name will become the visible hotspot name
- Set the Country to New Zealand
- Set Security to WPA2
- Set a good Wifi Password
- Make sure Address Aquisition is set to Automatic and take a note of the IP Address provided
- Turn Firewall Router off (unchecked). This will allow you to connect to the gateway over the LAN as well as via WiFi.
- Set an admin password (at the bottom of the screen) and apply the configuration.
The gateway will reboot. You will be able to connect to it wirelessly as before (with the new hotspot name), or you can connect to it over the LAN using the IP Address listed.
- On the Quick Set page, use ‘Check for updates’ to install the latest firmware (reconnect after it has rebooted.)

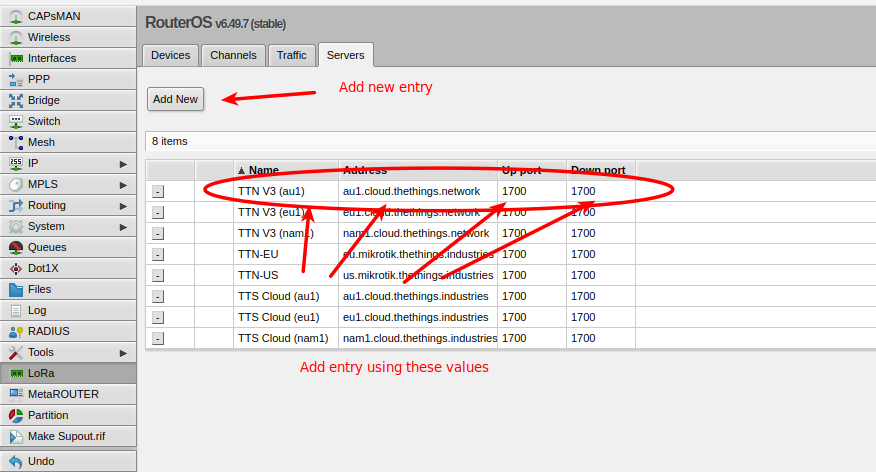
- Click the WebFig tab to open the LoRa > Servers tab. If it is not already listed, add the following:

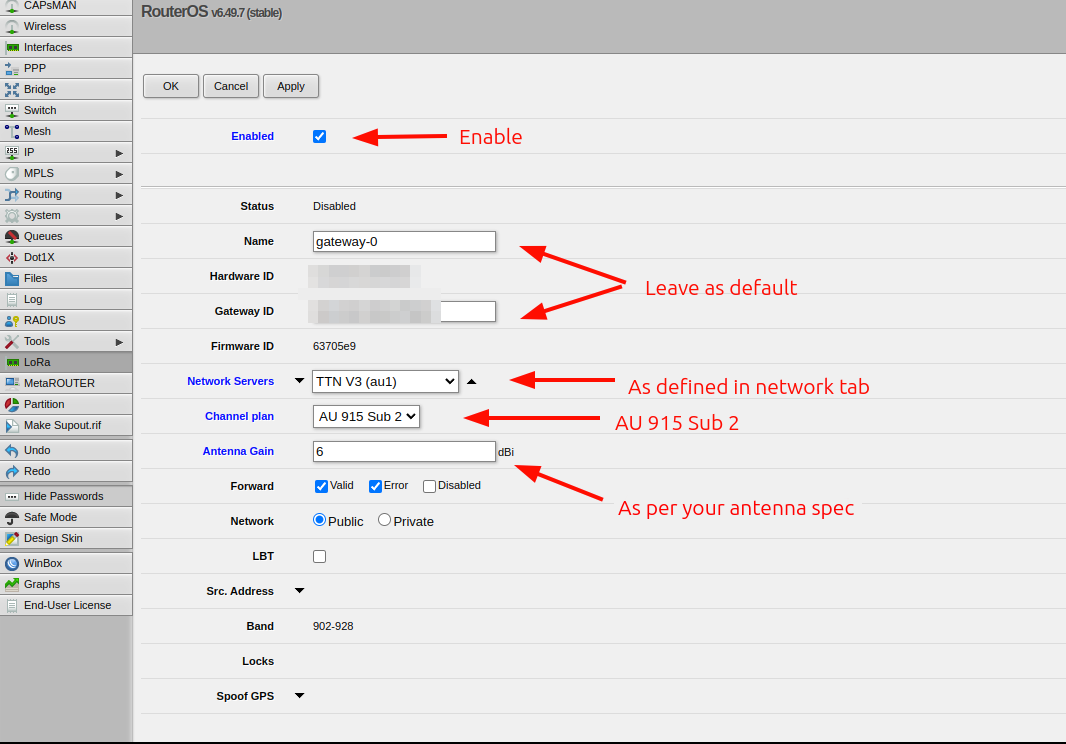
(you can delete the other entries) - Under the Devices tab, configure the LoRa router:


Network service setup
The gateway can now be added to the Things Network. Create an account on the website first and then Register a gateway. 
After a few minutes you should see the gateway connected. Set the location settings so that the gateway will be visible to other users.