App: General settings

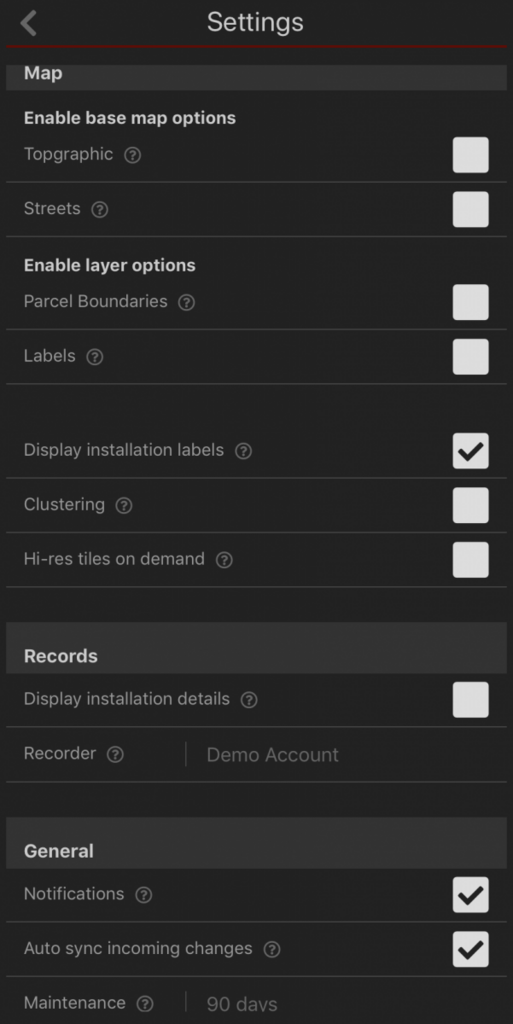
You can click the question mark next to each option to get some information about what the option does.
Enable base map options
Topographic
Enables the topographic base map. With this setting enabled you can use the layer control on the map to switch between the enabled base maps.
Streets
Enables the streets base map. With this setting enabled you can use the layer control on the map to switch between the enabled base maps.
Enable layer options
Parcel Boundaries
Provides a map of land, road and other parcel boundaries, and is especially useful for displaying property boundaries. This is displayed as a black outline overlaid on top of the current base map.
Labels
Shows labels for regions, cities, towns and street names on top of the current base map.
Display installation labels
This will turn labels on or off for your traps, bait stations and monitoring sites. The labels only show when you are zoomed in.
Clustering
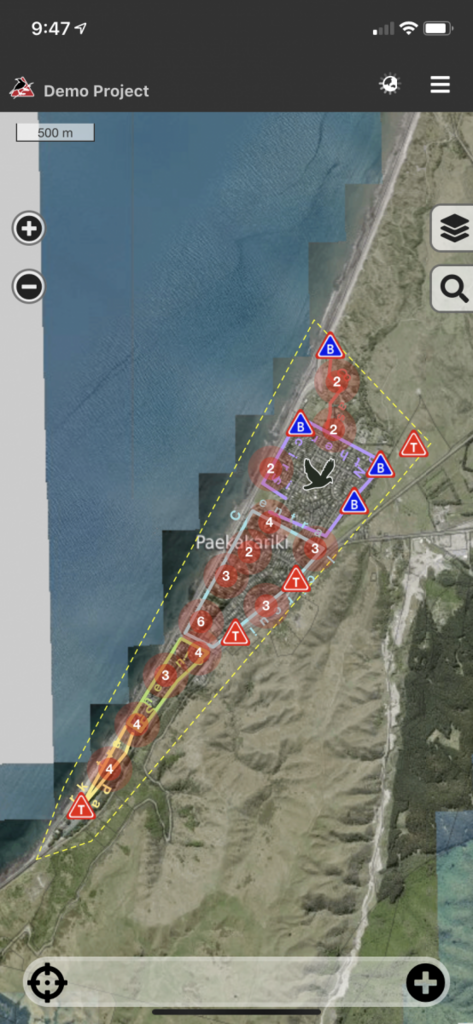
Some phones/tablets are very slow to display a map which has many installations on it. Clustering improves this
by displaying installations which are close to each other using
a single icon. Enabling this option will cluster all installations that are too close together to be individually visible. Clustering is always done if there are more than 150 installations visible on your screen.

Map with clustering turned on
Hi-res tiles on demand
This setting will automatically download higher detail maps when you have an internet connection available (mobile or WiFi). These are only stored temporarily on your device and won't be available offline. To save high detail map tiles for offline use, change the settings for Offline Tiles in Project settings.
Records
Display installation details
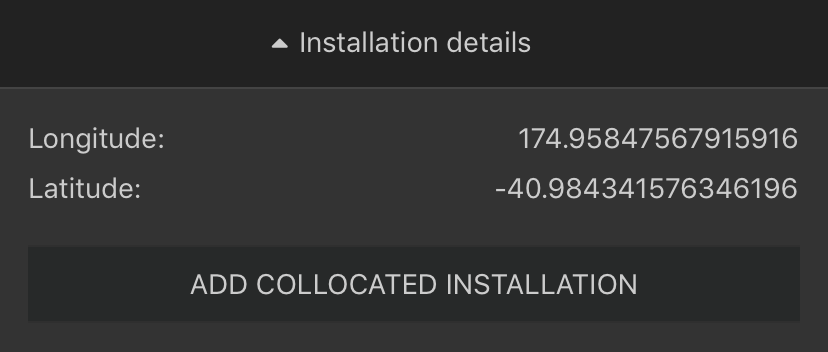
Installations can have notes entered against them on the website. Notes can be used to record hazard or access details. Notes (including some other information like coordinates and when the last record was added) can be automatically displayed when adding a record. Check this box to automatically display the installation notes.

Recorder
The name used to identify records you make. Defaults to your name on Trap.nz.
General
Notifications
Help popups will appear in some situations - you can disable these once you know your way around the app
Auto-sync incoming changes
By default the project will update with incoming changes soon after they occur.
This can be disabled in the General Settings. When disabled a cloud download button ![]() will appear in menu bar when changes are detected. Press this to bring down the changes.
will appear in menu bar when changes are detected. Press this to bring down the changes.
Automatically get updates when other members make updates to your project. With this setting disabled you will still get updates from other members, but this forces the updates to happen more quickly. We recommend that you leave this setting disabled as it can affect performance (especially on large projects with multiple trappers working simultaneously). You can manually sync at any time by clicking the cloud button on the main header.
Maintenance
After this period installations are highlighted in red to indicate they need attention. Defaults to 90 days.
