How do I use the map tool?
Moving around the map
You can pan around the map by clicking and dragging anywhere on the map. 
Use the zoom + and - buttons to zoom in and out of the map.
Understanding the toolbar
There is a toolbar at the bottom of the map. You can see the name of each tool by hovering the mouse over the icon.

The leftmost polygon tool will change depending on what you are doing on the map. If you are adding a trapline it will let you draw a line rather than a polygon, if you are adding a trap it will let you add a dot.
Drawing a shape on the map
To start drawing a shape on the map, click on the polygon tool to activate it (you will see the blue around the icon get slightly darker).
With the polygon tool active, click on the corners of the area that you want to manage. This will define the boundaries of your trapping project.
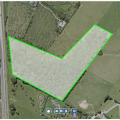
On the last corner, double-click to finish the drawing. The outline of the shape will change to green.
Editing the shape
If you didn't get the shape quite right you can change it: 
- Click on the "Edit features" tool
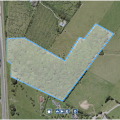
- Now click inside the shape you drew and the outline will turn blue
- Hover the mouse over the edge of your shape and a small black circle will appear
- By clicking and dragging on the black circle you can adjust the boundary of the project
- When you are done adjusting, click the "Edit features" tool again and the outline will return to green
Moving the shape on the map
If you drew the correct shape but put it in the wrong place you can drag it to a new location on the map.
- Click on the "Move features" tool
- Now click inside the shape you drew and the outline will turn blue and the cursor will change to a hand
- Click anywhere inside the blue outline and drag the shape to where you want it to be
- When you are done moving, click the "Move features" tool again and the outline will return to green.
Starting over
If your drawing has gone wrong and you'd like to start over, you can do this at any time by clicking the "Clear features" tool.
