Adding installation records
In order to add a record to an installation, you need to have the correct permissions.
Adding records to a single installation
You can add a record to an installation using the Trap.NZ app. If you wish to add a record using the website:
-
Select the installation you want to add a record to (from one of your project maps, or the lists of installations in the respective sections of your project).
-
If selecting from a map, click first on the icon for the installation, then click on the link that appears in red font.
-
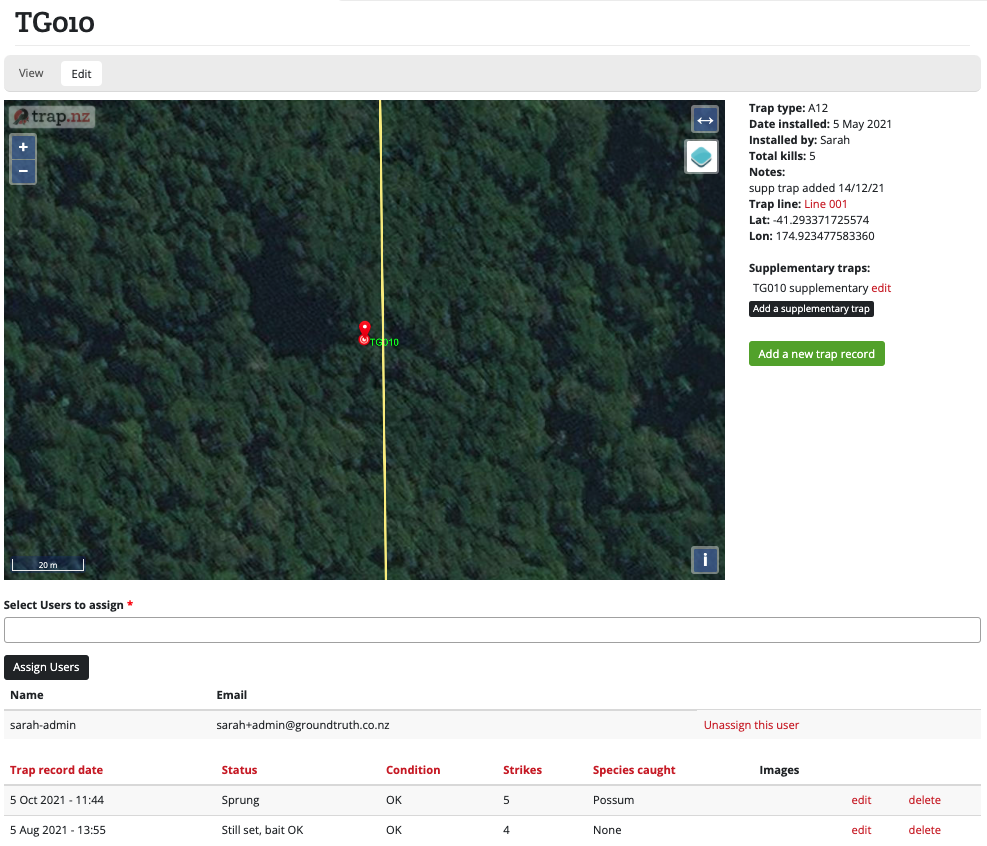
- The page for that installation will load, showing the installation on a map, some information about it, and a table of records (if any) below the map.
e.g.
- Click the green "Add a new (trap/bait station/monitoring) record" button, which will be to the right or below the map, depending on your screen size.
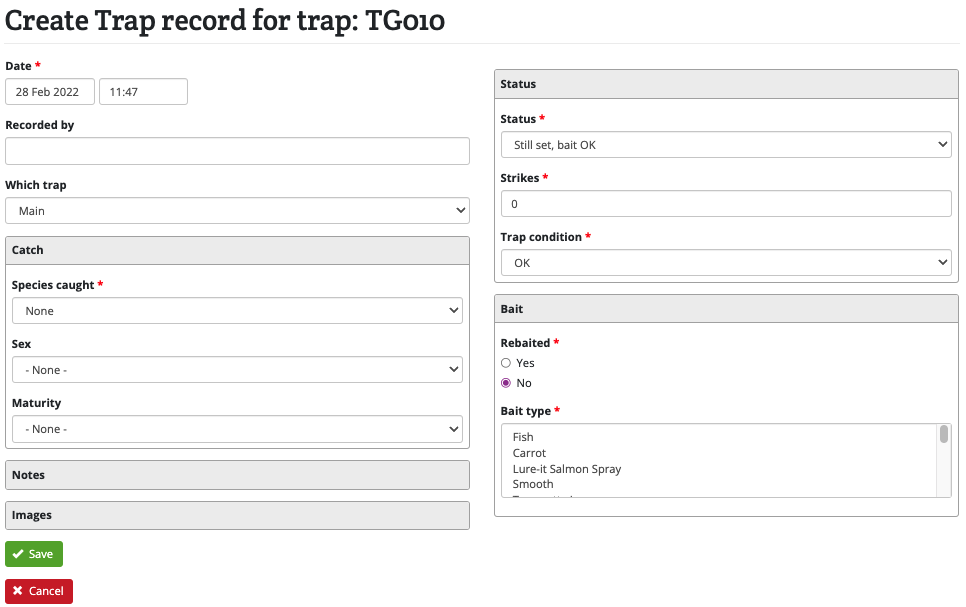
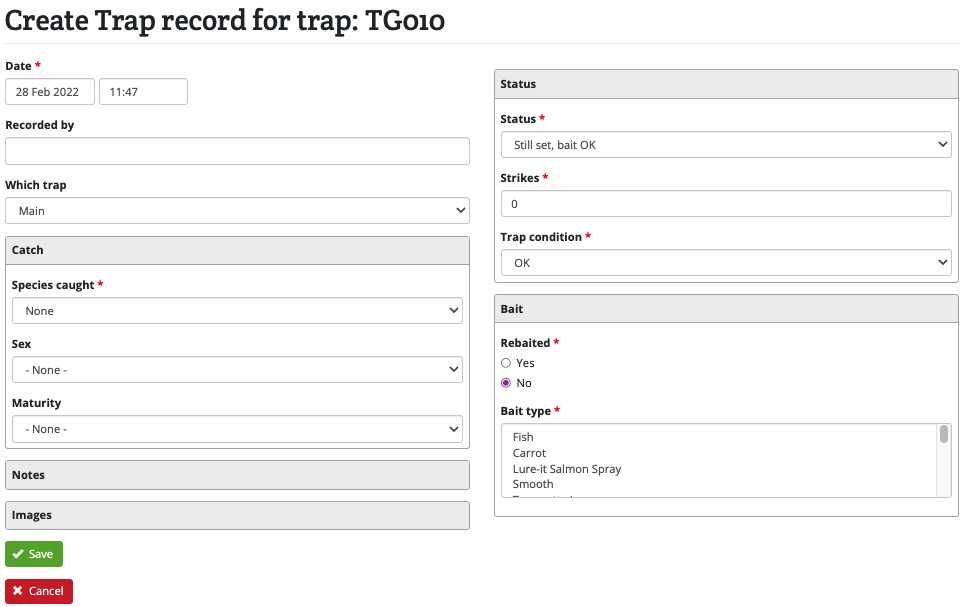
- The form to create a record for that installation will load.
e.g.
-
Enter in the details for this record. The starred fields are mandatory, the other fields are optional.
-
Click the green "Save" button when you are done.
-
The page for the updated installation will be displayed, and the record you created will be shown at the top of the table under the map.
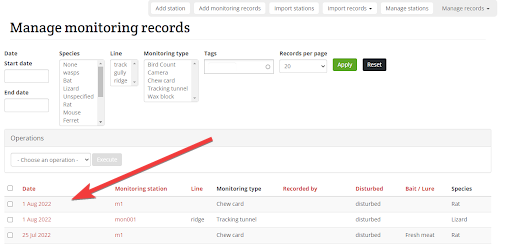
Adding records to multiple installations
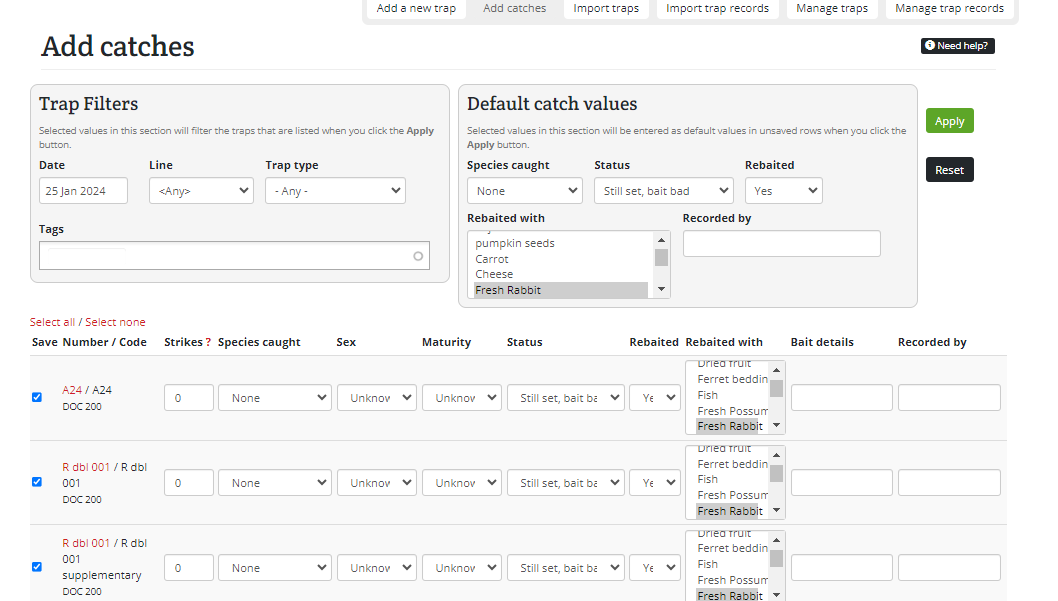
You can use the Add catches page to quickly update multiple traps, as below. This method allows only one record per installation per day, so if you want to add multiple records on one day to an installation, use a different method. Similar instructions will also work for updating multiple stations.
- Set the date for the updates you want to make.
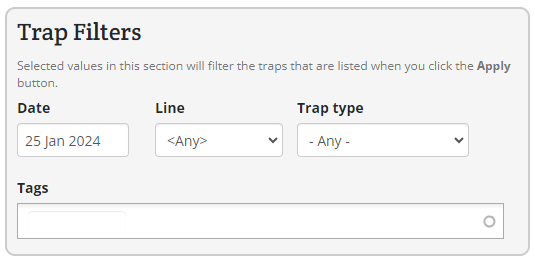
- (optional) If you only want to update some installations in your project, you can filter the installations by specifying a line, tags, or trap type
e.g. only show DOC250 traps on the Southern circuit line

- (optional) In the grey box, you can select default record values.
e.g. all traps caught a rat and were rebaited with cheese

- Click "Apply" and you will see a table appear showing the traps and default information you specified.

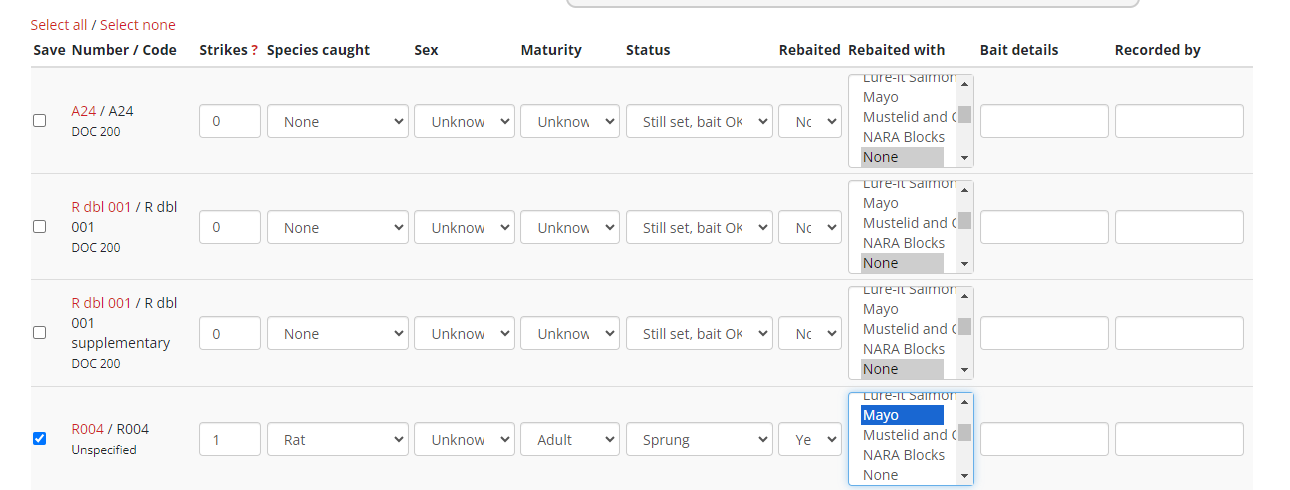
- (optional) You can override the default values you set above by editing each installation separately.
e.g. one of the traps didn't catch anything

- (optional) You can deselect the checkbox in the "Save" column of any installation you don't wish to update.
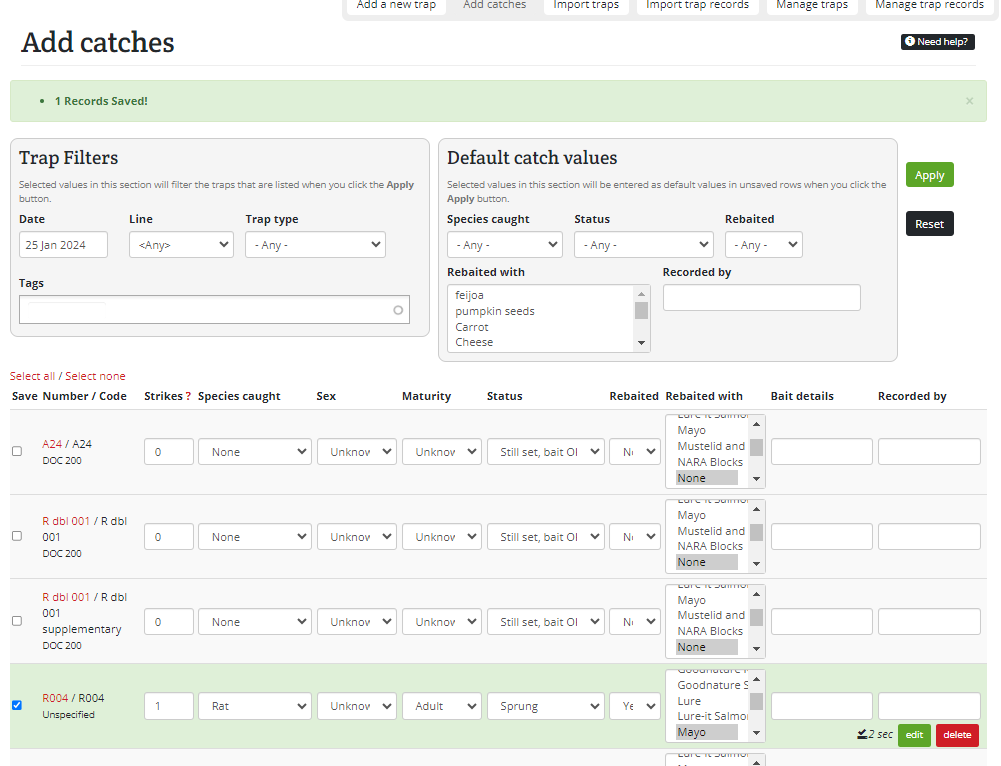
- Check all the information is correct, the click the green "Save" button at the bottom of the page when you're done.


- The rows will turn green to show that the records have been saved for the listed traps.

- If you have made a mistake, you can simply change the values of the appropriate record and click "Save" again. You can also delete individual records or edit them to add more details, such as trap condition or notes.
Adding bait station records
You can use the Add bait station data page to quickly add records to multiple bait stations.
- Apply a filter to select the bait stations you want to enter records for. Mostly you will be filtering by line, but you can also select individual bait stations by entering the first characters of the bait station number or code. By default the filter is set to show active bait stations only - use the dropdown to select retired bait stations.
- Set the date and time to be logged with each record you add. You will need to press the Apply date button whenever you change the date.
- For each bait station, put in the appropriate details and press the Save button.
The first time you add a record you will need to fill in all details. Put in 0 for Bait remaining and Bait removed. For subsequent records these details will be inserted automatically based on the previous record.
For the Active ingredient, Target species, and Formulation fields, a list of predefined values will be displayed once you start typing. Please select values from the list if possible.
Each row in the table shows the last record added (if there are any). You can click the edit button alongside the record to edit the full bait station record. You can edit or delete a record you've just added this way, or you can add notes to the record. The bait station row will turn green when a record has been recently added so that you keep track of where you are up to.
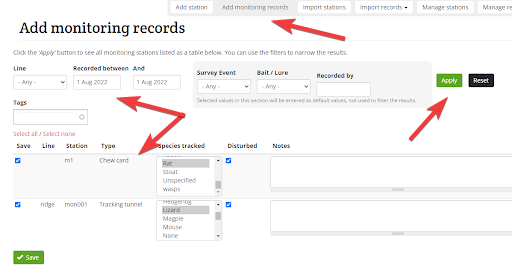
Adding Monitoring station records
You can use the page, Add monitoring station records to quickly add records to multiple monitoring stations.
- Apply a filter to select the monitoring stations you want to enter records for. Mostly you will be filtering by line, but you can also select individual monitoring stations by entering the first characters of the monitoring station number or code.
- Set the start and end date to be logged with each record you add. You will need to press the Apply date button whenever you change the date.
- For each monitoring station, put in the appropriate details and press the Save button.
- Check all the information is correct, then click the green "Save" button at the bottom of the page when you're done.
- The rows will turn green to show that the records have been saved for the listed monitoring stations.
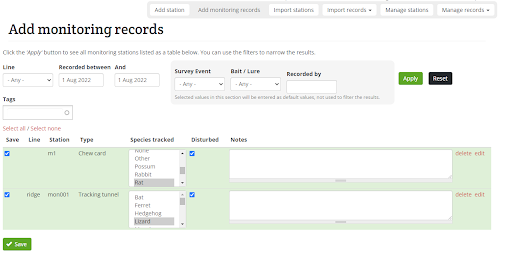
6. The records will now show the changes you have made.